Analytic Tool Simplifies Metal Fracture Assessments
NASA Technology
When NASA builds a spacecraft, materials engineers at the Agency have the important task of assessing the structural properties of the materials that comprise various hardware, whether it’s the hull of a crew capsule or the external tank of a rocket. By knowing these properties, they can ensure that these spacecraft and structures are safe for flight, which means determining if existing defects, such as cracks, will cause structural failure. To perform such work, engineers first have to determine each material’s fracture toughness—its ability to resist fracture when it contains a crack.
To derive fracture toughness for lightweight metals—aluminum and titanium alloys, for example, which are used in airplane and spacecraft hardware—plastic deformation must be taken into account. This is the amount of permanent deformation they can withstand without failing. (Even when cracked, depending on the circumstances, metals can continue to be used on flights before needing repair.)
Phillip Allen, a materials engineer and structural analyst at Marshall Space Flight Center, says to think of a paperclip. “If you bend it far enough, it won’t straighten back out,” he explains. “You’ve pushed it beyond its linear limit into the plastic regime, into permanent deformation. Then, if you cycle it back and forth enough times, it’ll break.” Contrast that with other materials like glass or some carbon-fiber composite materials that have basically a purely linear response. “They’re very stiff and brittle in nature. Once you exceed their ultimate capability, they just splinter and fail rapidly.”
To come up with the surface crack fracture toughness for plastic-deforming metals, engineers perform laboratory testing combined with what’s called nonlinear finite element analysis, which requires expertise in several niche fields. “Traditionally, you had to have somebody specifically skilled in nonlinear fracture mechanics and material behavior, and he or she needs to run an analysis of that test, which takes a long time and costs a lot of money,” says Allen, noting that it’s typical for such an endeavor to take upwards of eight hours.
In early 2012, he decided to create a software program that could automate the process, which is based on the American Society for Testing and Materials (ASTM) standard for testing surface cracks, E2899, that he and fellow NASA Marshall engineer Doug Wells had developed and tested over a 10-year period. The standard is used not only by NASA but also by airlines for aircraft safety and by oil companies to protect against pipe leaks and explosions, among others. “I wanted to open up the standard to a whole new group of labs that can run these types of tests for these different industries,” he says.
Technology Transfer
This project took Allen two years to complete, and it involved setting up scripts to automate the building of 600 nonlinear models and solutions, covering almost any metal one would ever use. He recalls, “Basically, it was a big bookkeeping problem.” Afterward, he took those results and distilled them into data arrays that software he had developed would interpolate in order to arrive at the fracture toughness value for a specific-sized crack in a given metal.
After developing an easy-to-use interface for the program, in January 2014 Allen made his free and open source program, Tool for Analysis of Surface Cracks, or TASC, available for download at Source Forge, a source code repository Web site.
Benefits
Determining a metal’s fracture toughness is relatively simple with TASC, Allen says. An engineer or a technician runs a fracture toughness test according to ASTM E2899, where a machine applies force to the metal, which is shaped as a plate with a surface crack in it, and instrumentation measures the forces and displacements on the plate as it begins to crack further and, at some later point, fail. The measurements made at the point when the crack begins to tear, combined with the material’s basic tensile properties (yield strength, elastic stiffness, and the strain-hardening exponent) and the resulting crack and plate dimensions (length, depth, width, and thickness), make up all the inputs needed to run TASC and acquire the metal’s fracture toughness point when it will start to tear and fail structurally. “That’s your limiting value that you would never want that structure to approach,” he says.
With that information, engineers can evaluate the risk posed by actual cracks found during inspections as well as by cracks that might be overlooked. To perform a structural evaluation of a defect, they input its dimensions and prompt the program to run the problem backwards to calculate the force needed to reach the fracture toughness point. Sometimes a crack requires immediate attention, Allen says, while others are left untouched for months, if not years, before they get near a threshold where repairs are necessary. “Engineers perform fracture mechanics calculations and may determine that a crack won’t grow to a size that would cause catastrophic failure during the time that passes before the next inspection,” he explains. By extension, smaller cracks that may be missed during inspection are also deemed safe in the interim.
Many industries, such as petroleum companies, have to weigh the risks posed by cracks very carefully. “Losing a pipe or a pump to a catastrophe is bad, but taking them down too often for service costs millions of dollars as well,” Allen says. “They invest heavily in fracture mechanics because they want to know with the greatest accuracy possible how long they can safely run their hardware.”
Greg Thorwald, a consulting engineer with Quest Integrity Group, based in Boulder, Colorado, has worked with NASA as well as companies big and small throughout the gamut of industry, says the time saved by using the software is substantial. Whereas in the past, it took him four or five hours to perform such a material analysis, “Using TASC, once you know how to use the software, you could do it in 20-30 minutes,” he says. “It’s one of those tools that you’ve got on the shelf, so to speak, and just knowing it’s there when you need it is pretty nice.”
As of this writing, 670 users in 60 countries have a copy of TASC on their shelves, figuratively speaking, according to Allen, who checks the number of downloads from Source Forge periodically. Among the users are university professors and their students, who he presumes are learning graduate-level fracture mechanics. “You can run problems with the software, and you get a lot of insight and understanding in a hurry because you can play with the variables and instantly see how they change the final answer and the shape of the response curves.”
The Agency is also busy using TASC, but for real-world applications, such as determining the fracture toughness properties of the metals comprising the core stage rockets and the solid rocket boosters of the Space Launch System, NASA’s next-generation launch vehicle slated to take humans deeper into the solar system than they’ve ever been. Similar work was also done with SpaceX’s Falcon 9 launch vehicle, which delivers supplies and experiments to the International Space Station.
In recognition of his work, Allen was one of two recipients of NASA’s prestigious Software of the Year Award for 2014. Right now he’s working toward what could be another success story: getting TASC designated as an official standard analysis tool for surface crack testing. “It will be the first ASTM mechanical testing standard that uses a computerized tool to get the answer. That would be cool.”
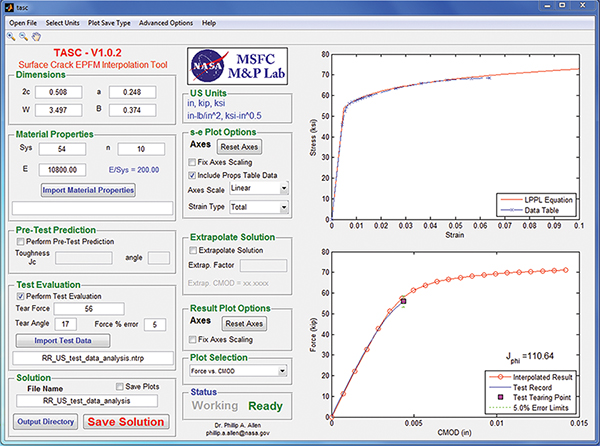
Marshall Space Flight Center materials engineer Phillip Allen developed the free, downloadable program Tool for Analysis of Surface Cracks, or TASC, to simplify determining a metal’s fracture toughness. Such a measurement helps engineers assess the point at which a crack will begin to tear and fail structurally. The software cuts the time needed to perform an analysis from several hours to 20 or 30 minutes.

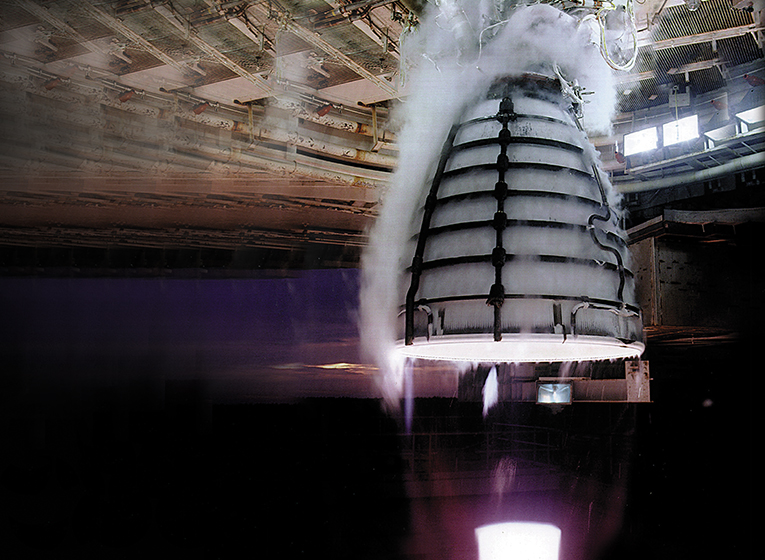
TASC has been used to determine the fracture toughness of the Space Launch System’s core stage rockets, which will comprise four modified RS-25s—the engines used to launch the Space Shuttle. Here, an RS-25 undergoes a hot-fire test.

